Sometimes I make something for the first time and I wonder why it’s taken me so long to get round to it. Iced tea is one of my favourite drinks, especially lemon iced tea, but other than a passion fruit and jasmine version I concocted a few years ago I’ve not made my own since. I wanted to make some to take on a recent picnic as I thought it would be nice and refreshing in the late summer sun. Considering this only uses three ingredients, I used the very best ones I could: all organic and the tea I used had the wonderfully, British, charming name ‘Georgian Old Gentleman’.
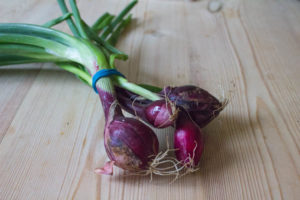
Chorizo Hash with Purple Spring Onions
Sometimes the vegetables that arrive in my veg box are so stunning that it (almost) seems a shame to eat them. We all know that a romanesco cauliflower is mathematically wonderful and who can say no to a green lemon when it’s yellow inside and full of juice. A bunch of purple spring onions turned up on my doorstep and I knew simplicity would be the way to make the most of them; bold flavours from few ingredients. Chorizo Hash with Purple Spring Onions was certainly the way to go.
Ingredients
You will need (for two):
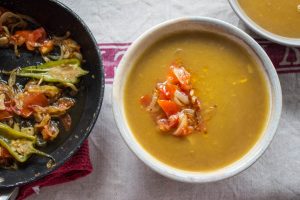
Yellow Split Pea Dahl
First impressions are terribly important, but then so is not judging a book by its cover. This may look, on first glance, like a bowl of indistinct yellow mush but trust me, don’t judge this bowl of incredible-ness by its ‘rustic’ appearance. When I have a bowl of dahl it has to be three things: comforting, frugal and full of garlic. My Yellow Split Pea Dahl, which I have been trying and testing for some time now, fulfils all of my dahl needs and wants. Absolutely dahl-icious.
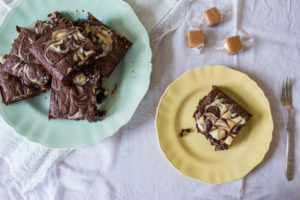
Chocolate Fudge Cheesecake Brownies
I like to think I’m fairly well behaved. The majority of what I eat I make myself and is somewhat healthy and well balanced. I find a place for the indulgent dishes (macaroni cheese, dauphinoise and the like) amongst the day to day soups, salads, vegetables and wholegrains. I’m by no means a saint and I think a little indulgence never hurt anyone. When I plan to make something that’s maybe a little bit ‘naughty’ I make sure I go all out. These Chocolate Fudge Cheesecake Brownies are no exception; prepare to enjoy.
Ingredients
You will need (for 9 brownies):
- 200g full fat soft cheese
- 1/2 tsp vanilla extract
- 200g caster sugar
- 2 eggs
- 100g butter
- 50g light muscovado sugar
- 100g dark chocolate, broken into pieces
- 1 1/2 tbsp golden syrup
- 100g self raising flour
- 2 tbsp cocoa powder
- 50g fudge, chopped into small pieces
Method
Grease an eight inch shallow, square cake tin. Preheat your oven to 180C.
Gently beat the cream cheese with the vanilla extract and two tbsp of the caster sugar. Mix until smooth.
Put the butter, remaining sugars, dark chocolate and golden syrup into a small saucepan and heat gently until everything is combined and smooth. Remove from the heat and leave to cool.
Beat the eggs in a large bowl then whisk in the cooled chocolate mixture along with the fudge pieces.
Sift the flour and cocoa powder into the chocolate and egg mix then fold everything together.
Pour the brownie mix into the prepared tin then dollop the cream cheese mixture over the top. Use a spoon or skewer to marble the cream cheese through the brownie mix.
Bake in the oven for 30 minutes or until it’s just coming away from the edge of the tin but is still slightly gooey.
These chocolate fudge cheesecake brownies make you pull the face that only a full fat, full sugar, no compromise baked good can; somewhere between falling asleep, pure satisfaction and absolute delight. The fudge pieces are slightly caramelised and chewy when the brownies are warm, the cheesecake part adds a slight tang and freshness and it’s all surrounded by gooey, spongey chocolate. You need to use a few different bowls for making these so there’s a little more washing up than some of my usual recipes but trust me, it’s worth it. Just think how many extra calories you’ll burn doing the washing up, just in time for when these are ready to come out of the oven.
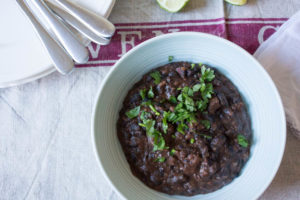
Mexican Black Beans
I tried something similar to these Mexican black beans at a restaurant a few weeks ago. They were so tasty and I loved the frugality of them that I really wanted to try and make them at home. Attempt one tasted fine but the texture was all wrong, attempt two was an improvement but the spicing wasn’t quite right. By the third attempt I’d got it; tasty, slightly spicy, cheap and easy to make. Does it get much better?
Ingredients
You will need (for 2):
- 1 can black beans, drained and rinsed £0.65
- 2 garlic cloves, crushed £0.10
- 1 small chilli, halved £0.15
- 150ml chicken stock (you could use vegetable stock to make these vegetarian or vegan) £0.30
- ½ tsp ground cumin £0.05
- ½ tsp smoked paprika £0.05
- oil for cooking £0.10
- salt and pepper £0.05
- fresh coriander, chopped £0.30
- Rice to serve £0.30
Total for two: £2.05
Method
Heat a little oil in a saucepan on a medium heat and add the garlic. Fry for a minute or so and don’t let the garlic catch. Add the chilli and spices and keep everything moving.
Add the beans, stock, a little salt and pepper then pop a lid on and leave to simmer lightly for 15 minutes.
Take the lid off and continue to cook for another five minutes; lightly mash most of the beans with the back of the spoon until it’s like a very thick soup.
Remove from the heat and allow to cool slightly and thicken up a little more, stir through the fresh coriander and serve.
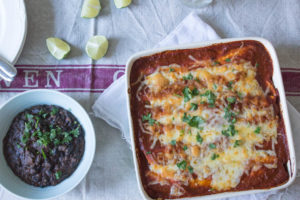
I had this on the side with my enchiladas recently but the previous versions were served with rice or quinoa (both good choices) and a fresh tomato salad. I left the chilli out of the first batch I made and it still tastes great but adding it does give that lovely fresh chilli flavour to the beans and along with the spices, garlic and coriander this is a very tasty bowl of stuff. And I bet you’ve got most of the ingredients in your cupboards already. I would be tempted to thicken these beans up further, spread them over a wrap, top with some leftover shredded chicken and fresh tomato salsa, roll and enjoy.
Chipotle Chicken Enchiladas
We were about halfway through this meal when the OH turned to me and said, “This is the best dinner we’ve ever cooked”. High praise indeed. Although I once baked a whole cabbage and anything would be an improvement on that. Chicken enchiladas always remind me of my University days. My friend Kathryn and I would convince ourselves we could definitely eat four people’s worth of enchiladas. We’d cook it all up and be full after just half of the available enchiladas, look at each other and say, “Next time, we’ll just cook half ok?”. We never learnt. I haven’t made enchiladas since then and I thought it was high time I made some proper ones.
Ingredients
You will need (to feed 3-4 people):
For the enchilada sauce
- 1 red onion, sliced
- 2 garlic cloves, sliced
- 1 tsp ground cumin
- 1 tsp paprika
- 1 dried chipotle chilli, roughly chopped
- 500ml tomato passata
- 1 tsp dried oregano
- ½ tsp sugar
- Salt and pepper
- Oil for cooking
For the enchiladas
- 2 chicken breasts, diced or sliced
- 1 onion, sliced
- Oil for cooking
- 6-8 tortilla wraps
- 120g cheddar cheese, grated
Method
Start by making the enchilada sauce. Add the onions and garlic to a saucepan with a little oil and fry gently for at least 20 minutes until softened and starting to turn golden brown. You want to slightly caramelise them to bring out their sweetness.
Add the cumin, paprika and chilli and fry for another minute more.
Pour in the passata, oregano, sugar and add a little salt and pepper. Cook for 15 minutes or so until the mix has reduced by around a third.
Leave to cool slightly before blending until the sauce is smooth. Taste and add more salt or pepper if needed.
Put a frying pan on a medium heat with a little oil and add the onion. Fry gently for 10 minutes until softened then add the chicken and turn up the heat. Cook until the chicken is golden brown and cooked through. Add just less than half of the enchilada sauce to the frying pan and ensure all the chicken is well coated.
Divide the chicken mixture between the tortillas. Wrap each one tightly and lay in a baking dish so they fit nice and snugly.
Pour the remaining sauce over the top of the wraps then top with the cheese.
Bake in a preheated oven at 180C for 15-20 minutes until lightly golden brown on top.
Serve with Mexican black beans (recipe for these here), guacamole, sour cream, extra chilli sauce and whatever you like!
If you can’t find chipotle chillies then I’m sure chipotle paste would be a great alternative. It’s the smoky flavour that you’re after along with a bit of heat. It’s taken a few tries to perfect this recipe but I’ve cracked it! Caramelising the onions is key to give the sauce a nice bit of sweetness. Not only can it be used for enchiladas, you can use it for chilli con carne and fajitas too (and even for a Mexican twist as a pizza sauce!).
Five Dipping Sauce recipes that are perfect for Summer
The living is easy in summer. Gorgeous fresh produce, long days, and fantastically easy recipes. Create some wonderful dishes that will accompany you while you’re out and about or that you can simply enjoy while sitting at home.
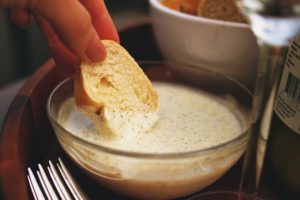
The easiest way to produce some seriously delicious snacks, that are creative and simple to prepare, is to investigate the world of dips. From mayonnaise to sour cream, from pulses to avocados; dips can be healthy, tasty and fun to eat. Here are five ideas to start you on your way – enjoy!
Mayonnaise
Mayonnaise isn’t one of life’s great mysteries. It’s relatively easy to make or you can buy it premade and add something, such as fresh chilli, to spice things up. Patience is the most important ingredient if you’re making it from scratch. Once you’ve broken two egg yolks into a blender add some salt, pepper, crushed garlic (optional) and some olive oil, a drop at a time for the first five drops, and only then let the oil flow in a consistent stream. The mixture will bind and then you can add the wine vinegar and play about with herbs, spices or mustard. To serve, the tried and tested match made in heaven, mayo with chips, never goes a miss.
Guacamole
For a dip with a Mexican twist Guacamole is the obvious answer. You can make this dish as hot as you like, though if you’re entertaining remember that not everyone enjoys tasting the hottest chillies on the Scoville scale! After you’ve combined mashed avocado with diced tomatoes, onions and a few jalapenos add lime or lemon juice, salt and pepper, and, although not strictly Mexican, you can even add some sour cream. Most importantly you’ll have created a super cool dip.
Peppers and Walnuts
The wonderfully sweet taste of red peppers works so well with walnuts. Roast the red peppers, then dice bread and walnuts. Add these ingredients to a blender and add pepper, lemon juice, cumin and a pinch of cayenne pepper to the mix. Taste, taste and then taste again just add a little cayenne at a time, less really is more here. Prepare flatbreads or put some crispy McCain fries in the oven to really complement this dip.
Asian Inspired Mayonnaise
The gentle flavours of ginger, soy sauce and sesame seeds combined with homemade mayonnaise and fresh spring onions make for a very light and tasty dip. You could have this as an accompaniment to barbequed prawns or you can just enjoy this as a dip with crisps. Simply combine all the ingredients in a blender, taste and then serve. It really is as easy as that.
Hummus
Boiled and mashed beans have been the basis of many North African and Middle Eastern dips for centuries. They’re easy to prepare and they’re tasty too. The fantastically delicious hummus is a wonderful combination of crushed chickpeas, tahini (sesame paste) lemon, cumin and garlic. Blend all the ingredients together and you will have created a very moreish dip.
The wonderful thing about hummus is that you can add other flavours, sundried tomatoes are a good idea, or you could be really adventurous and add a variety of crushed nuts to the mix. If you’re looking for colour, roasted beetroot will add a sensational look and taste to your dip.
Dips are easy; you’ll only be limited by your imagination when it comes to preparing these succulent delights. Open your mind, experiment and, most importantly, have some fun!
This is a collaborative featured post. Thank you for supporting the brands that support me.
Grapefruit, Lime and Basil Agua Fresca
I’ve toyed with the idea of making an agua fresca for a little while. What with the focus on Brazil and South America at the moment with the Olympics I have seen a few frescas popping up on menus. But I wondered, is it worth the effort, isn’t it just easier to squeeze a bit of fruit then water it down? Well yes, but it turns out it’s just not the same. And the (what might seem an unnecessary step but take my word for it it’s definitely needed) sieving does save you from any surprise seeds making into your final beverage. I had a couple of grapefruits loitering round in my fruit bowl and thought it was now or never. So, welcome to my Grapefruit, Lime and Basil Agua Fresca.
Ingredients
You will need (for two glasses):
- 2 grapefruits
- 1 lime
- Small handful basil
- 1 dsp sugar
- Chilled sparkling water
Method
Peel the grapefruits and lime and add to a food processor with the basil and sugar then blend to make a smooth puree.
Pass the puree through a sieve into two glasses then top up with sparkling water. If you’re feeling fancy, add a bit of lime peel to each glass.
It’s by no means a complicated recipe but considering how simple it is it does generate a fair amount of washing up! It’s super refreshing and a great way to use up a few pieces of fruit that you have left over. I loved the pink colour of the drink and that you could see teeny tiny pieces of basil floating in the glass, the grapefruit, lime and basil worked really nicely together and made for something different to drink which will see me all through the summer. You could try this with all sorts of other fruits and herbs; I’m thinking pineapple and mint or watermelon and lavender would be amazing.
Honeyed Apricots with Rosemary Crème Fraîche
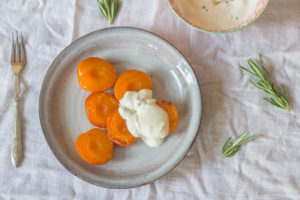
Apricots make me think of my Mum. She’s the biggest apricot fan I know and until last year I didn’t really get what all the fuss was about. Then I had a proper one. Not a dry, fuzzy one with an inside like loft insulation but a sweet, juice running down the chin, superbly ripe one. And everything changed. Honeyed Apricots with Rosemary Crème Fraîche might sound like an unusual combination but herbs and fruit work so well together and this is truly a winner. Ripe apricots would be fantastic for this dish, but if they’re a bit ropy then sizzling them in honey will only improve them.
Ingredients
You will need (for two):
- 6 apricots
- 1 tbsp honey
- 4 tbsp crème fraîche
- 1 sprig fresh rosemary, leaves finely chopped
- 1/2 tsp vanilla extract
Method
Halve the apricots and remove the stones. This was much easier than I thought it would be, the stones just fell out.
Warm up a small frying pan (a griddle pan would be good if you have one) then add the apricots, flesh side down and let them sizzle gently for a minute or two. Flip the apricots over so they are skin side down and fry for another minute. Finally, flip the apricots once more and add the honey to the pan. Move the apricots round in the honey so they are nicely covered and faintly caramelised.
Mix together the crème fraîche, rosemary and vanilla.
Serve up the apricots and dollop the crème fraîche mixture over the top.
This dessert is so summery it’s asking to be eaten outside with a lovely glass of dessert wine. The apricots are unctuously soft; they fall apart as soon as you dig your spoon in. Apricots and honey work so well together to bring some sweetness and coupled with the sharp crème fraîche it cuts through everything beautifully. The rosemary is distinctive but the faint whiff you get from it with the vanilla at the same time is just the best. I love herbs and fruit together and this combination of honey, apricots and rosemary is honestly one of my favourite puddings I have ever made. From slicing the apricots to sitting down to eat this for pudding takes less than 10 minutes and I can’t think of anything I’d rather eat under the shade of the tree in my garden.
Harissa Lamb with Tabbouleh
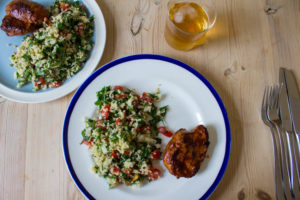
When it’s hot in the day but slightly cooler in the evenings, sometimes a salad doesn’t quite cut it; I’m after something with a little warmth and zing for those colder evenings. This Harissa Lamb with Tabbouleh came about for two reasons: firstly I had some harissa paste leftover from a previous chicken version and secondly I had two lamb steaks which were crying out for some Middle Eastern flavours. Also, this recipe is part of an upcoming post where I look at eating organic on a budget so it worked out really well to use up some lovely veg and herbs I had in the kitchen. Also, if you make double the amount of tabbouleh it’s great for lunch the next day, particularly with some toasted pitta bread and hummus.
Ingredients
You will need (for two):
- 2 lamb steaks
- 1 tbsp harissa paste
- Oil for frying
- Salt and pepper
- 50g bulgur wheat
- Large handful of parsley and mint, roughly chopped
- 3 medium/large tomatoes, diced
- 1 small onion, finely chopped
- Juice of one lemon
- 2 tbsp extra virgin olive oil
- Salt and pepper
Method
Start by cooking the bulgur wheat according to packet instructions. If you don’t have bulgur wheat you can use cous cous or quinoa. I have made tabbouleh with all three and they’re all equally as good.
While the bulgur is cooking prepare all the vegetables and herbs and put into a bowl.
Once the bulgur is cooked, add this to the veg in the bowl then add the lemon juice, olive oil and a sprinkling of salt and pepper. Mix well and put to one side.
Heat a frying pan to a medium heat and add a little oil. Season the lamb steaks on both sides then put into the pan. Cook the lamb, turning over to make sure both sides are lovely and brown until cooked through (or cooked to your liking). Just before they are cooked brush each side with the harissa paste while still in the pan so the paste catches the heat slightly and caramelises.
Serve the lamb with the tabbouleh.
Similar to lots of my posts recently, this meal is ready in around 30 minutes, is full of flavour and makes the most of what I have in the fridge and cupboards at the time. I think this would be fantastic with some lamb koftas or butterflied chicken cooked on the barbecue then brushed with the harissa for the last few minutes of cooking. The more parsley and mint you add, the more intense the flavour (and colour!) is. I prefer to keep the herbs roughly chopped as I like the texture with the crunchy onions and soft tomatoes. This is my kind of summer cooking.
- « Previous Page
- 1
- …
- 12
- 13
- 14
- 15
- 16
- …
- 41
- Next Page »
