I live in a village and on first appearances it has all the qualities of somewhere straight out of Call The Midwife. Actually living there is quite different; people don’t know each others names, good luck trying to get them to take your bins in for you and there’s so much material competition it’s like a car forecourt out there. Of course there are exceptions; one of which is the white house on the corner. They have a Bramley apple tree and although (this year especially) they don’t get many apples from it they always put a box of windfalls outside their gate for people to take. I helped myself to one of their apples and set about making some Bramley apple and nut flapjacks.
Lentils and Chard
There’s always a pack of lentils in my kitchen cupboards. Sometimes more than one; the quick cooking red variety to throw into soups, the big fat yellow ones for making dahl and the more elegant puy for making a wholesome side dish or salad. The mealy, earthy taste and texture that comes from a lentil is part of its charm; the fact that they are so humble but so versatile and filling is why I always find myself with lentils on my plate at least once a week. This dish of lentils and chard was served alongside some simply griddled chicken but it was so good that I think it’s perfect as a meal on its own.
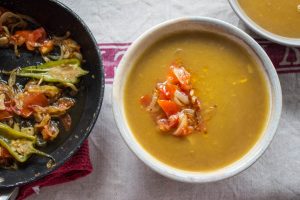
Yellow Split Pea Dahl
First impressions are terribly important, but then so is not judging a book by its cover. This may look, on first glance, like a bowl of indistinct yellow mush but trust me, don’t judge this bowl of incredible-ness by its ‘rustic’ appearance. When I have a bowl of dahl it has to be three things: comforting, frugal and full of garlic. My Yellow Split Pea Dahl, which I have been trying and testing for some time now, fulfils all of my dahl needs and wants. Absolutely dahl-icious.
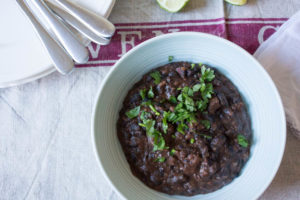
Mexican Black Beans
I tried something similar to these Mexican black beans at a restaurant a few weeks ago. They were so tasty and I loved the frugality of them that I really wanted to try and make them at home. Attempt one tasted fine but the texture was all wrong, attempt two was an improvement but the spicing wasn’t quite right. By the third attempt I’d got it; tasty, slightly spicy, cheap and easy to make. Does it get much better?
Ingredients
You will need (for 2):
- 1 can black beans, drained and rinsed £0.65
- 2 garlic cloves, crushed £0.10
- 1 small chilli, halved £0.15
- 150ml chicken stock (you could use vegetable stock to make these vegetarian or vegan) £0.30
- ½ tsp ground cumin £0.05
- ½ tsp smoked paprika £0.05
- oil for cooking £0.10
- salt and pepper £0.05
- fresh coriander, chopped £0.30
- Rice to serve £0.30
Total for two: £2.05
Method
Heat a little oil in a saucepan on a medium heat and add the garlic. Fry for a minute or so and don’t let the garlic catch. Add the chilli and spices and keep everything moving.
Add the beans, stock, a little salt and pepper then pop a lid on and leave to simmer lightly for 15 minutes.
Take the lid off and continue to cook for another five minutes; lightly mash most of the beans with the back of the spoon until it’s like a very thick soup.
Remove from the heat and allow to cool slightly and thicken up a little more, stir through the fresh coriander and serve.
I had this on the side with my enchiladas recently but the previous versions were served with rice or quinoa (both good choices) and a fresh tomato salad. I left the chilli out of the first batch I made and it still tastes great but adding it does give that lovely fresh chilli flavour to the beans and along with the spices, garlic and coriander this is a very tasty bowl of stuff. And I bet you’ve got most of the ingredients in your cupboards already. I would be tempted to thicken these beans up further, spread them over a wrap, top with some leftover shredded chicken and fresh tomato salsa, roll and enjoy.
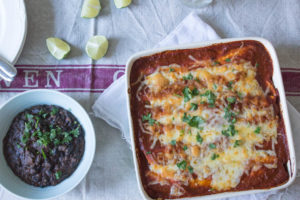
Chipotle Chicken Enchiladas
We were about halfway through this meal when the OH turned to me and said, “This is the best dinner we’ve ever cooked”. High praise indeed. Although I once baked a whole cabbage and anything would be an improvement on that. Chicken enchiladas always remind me of my University days. My friend Kathryn and I would convince ourselves we could definitely eat four people’s worth of enchiladas. We’d cook it all up and be full after just half of the available enchiladas, look at each other and say, “Next time, we’ll just cook half ok?”. We never learnt. I haven’t made enchiladas since then and I thought it was high time I made some proper ones.
Ingredients
You will need (to feed 3-4 people):
For the enchilada sauce
- 1 red onion, sliced
- 2 garlic cloves, sliced
- 1 tsp ground cumin
- 1 tsp paprika
- 1 dried chipotle chilli, roughly chopped
- 500ml tomato passata
- 1 tsp dried oregano
- ½ tsp sugar
- Salt and pepper
- Oil for cooking
For the enchiladas
- 2 chicken breasts, diced or sliced
- 1 onion, sliced
- Oil for cooking
- 6-8 tortilla wraps
- 120g cheddar cheese, grated
Method
Start by making the enchilada sauce. Add the onions and garlic to a saucepan with a little oil and fry gently for at least 20 minutes until softened and starting to turn golden brown. You want to slightly caramelise them to bring out their sweetness.
Add the cumin, paprika and chilli and fry for another minute more.
Pour in the passata, oregano, sugar and add a little salt and pepper. Cook for 15 minutes or so until the mix has reduced by around a third.
Leave to cool slightly before blending until the sauce is smooth. Taste and add more salt or pepper if needed.
Put a frying pan on a medium heat with a little oil and add the onion. Fry gently for 10 minutes until softened then add the chicken and turn up the heat. Cook until the chicken is golden brown and cooked through. Add just less than half of the enchilada sauce to the frying pan and ensure all the chicken is well coated.
Divide the chicken mixture between the tortillas. Wrap each one tightly and lay in a baking dish so they fit nice and snugly.
Pour the remaining sauce over the top of the wraps then top with the cheese.
Bake in a preheated oven at 180C for 15-20 minutes until lightly golden brown on top.
Serve with Mexican black beans (recipe for these here), guacamole, sour cream, extra chilli sauce and whatever you like!
If you can’t find chipotle chillies then I’m sure chipotle paste would be a great alternative. It’s the smoky flavour that you’re after along with a bit of heat. It’s taken a few tries to perfect this recipe but I’ve cracked it! Caramelising the onions is key to give the sauce a nice bit of sweetness. Not only can it be used for enchiladas, you can use it for chilli con carne and fajitas too (and even for a Mexican twist as a pizza sauce!).
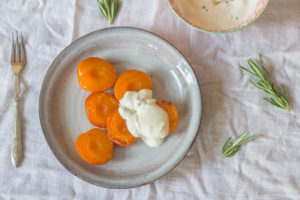
Honeyed Apricots with Rosemary Crème Fraîche
Apricots make me think of my Mum. She’s the biggest apricot fan I know and until last year I didn’t really get what all the fuss was about. Then I had a proper one. Not a dry, fuzzy one with an inside like loft insulation but a sweet, juice running down the chin, superbly ripe one. And everything changed. Honeyed Apricots with Rosemary Crème Fraîche might sound like an unusual combination but herbs and fruit work so well together and this is truly a winner. Ripe apricots would be fantastic for this dish, but if they’re a bit ropy then sizzling them in honey will only improve them.
Ingredients
You will need (for two):
- 6 apricots
- 1 tbsp honey
- 4 tbsp crème fraîche
- 1 sprig fresh rosemary, leaves finely chopped
- 1/2 tsp vanilla extract
Method
Halve the apricots and remove the stones. This was much easier than I thought it would be, the stones just fell out.
Warm up a small frying pan (a griddle pan would be good if you have one) then add the apricots, flesh side down and let them sizzle gently for a minute or two. Flip the apricots over so they are skin side down and fry for another minute. Finally, flip the apricots once more and add the honey to the pan. Move the apricots round in the honey so they are nicely covered and faintly caramelised.
Mix together the crème fraîche, rosemary and vanilla.
Serve up the apricots and dollop the crème fraîche mixture over the top.
This dessert is so summery it’s asking to be eaten outside with a lovely glass of dessert wine. The apricots are unctuously soft; they fall apart as soon as you dig your spoon in. Apricots and honey work so well together to bring some sweetness and coupled with the sharp crème fraîche it cuts through everything beautifully. The rosemary is distinctive but the faint whiff you get from it with the vanilla at the same time is just the best. I love herbs and fruit together and this combination of honey, apricots and rosemary is honestly one of my favourite puddings I have ever made. From slicing the apricots to sitting down to eat this for pudding takes less than 10 minutes and I can’t think of anything I’d rather eat under the shade of the tree in my garden.
Tikka Paneer and Pilaf
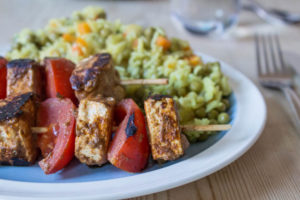
I love paneer. If I see a menu and it has paneer on it, I will order it without a doubt, preferably alongside a thick, garlicky daal of some description. As the cheese itself is quite flavourless it lends itself to being mixed with punchy flavours and spices. This Tikka Paneer and Pilaf is one of those meals which you start in the morning before work (mixing the marinade) and then finish off in the evening. And, as usual, it’s ready in around 30 minutes and won’t break the bank; a perfect vegetarian midweek meal.
Ingredients
You will need (for four):
- 225g paneer cheese, cut into cubes £1.50
- 3-4 medium tomatoes, quartered £0.40
- 2 tbsp tikka paste £0.15
- 2 tbsp plain yoghurt £0.15
Lamb, Lentils and Flatbreads
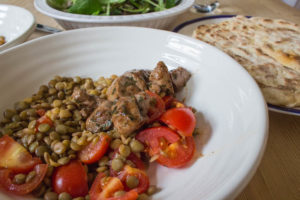
When it’s a weekday and you come back from work to cook dinner, I’m assuming it’s not just me, you actually just want to relax. The cooking should be straightforward, ideally with minimal washing up and the food should be tasty, filling and balanced. I’ve been adding more and more recipes to my weeknight repertoire that are just that; minimum fuss, maximum flavour and ideally ready in under 30 minutes. This recipe for lamb, lentils and flatbreads was another midweek success and is also part of an upcoming post about eating organic on a budget.
Ingredients
You will need (for two people):
- 2 lamb steaks
- Salt and pepper
- Oil for cooking
- 75g green lentils
- 1 vegetable stock cube
- Two big handfuls salad leaves
- 4-5 ripe tomatoes, roughly chopped
- 1 tbsp extra virgin olive oil
- 1 lemon, juice only
For the flatbreads
- 150g natural yoghurt
- 150g self raising flour (I actually ran out of self raising and used strong bread flour and they worked just as well)
- 1/4 tsp baking powder
Method
Cook the lentils in vegetable stock according to the packet instructions.
Make the flatbreads by mixing all the ingredients together until you have a dough. Divide the dough into four and roll out until about half as thick as a pound coin.
Get a frying pan onto a high heat then add the flatbreads, one at a time, dry frying them until they are golden brown on both sides. Pop them into a low oven to keep them warm while you cook them all.
Season the lamb on both sides. Get a frying pan on a medium-high heat with a little oil then add the lamb and fry until cooked through. Remove then slice up.
Drain the lentils then mix with the olive oil, lemon juice and tomatoes. Top with the lamb and serve with the flatbreads and salad.
I have made these flatbreads before (they originally came from a Jamie Oliver recipe) and they are always good and can easily be made in the time it takes the lentils to cook. I only used two small lamb steaks; the lentils are really filling. It’s well worth cooking the lentils in the vegetable stock so give them a bit of a boost. The tomatoes, it helps if they’re really ripe, and the salad add a lovely bit of freshness and crunch. The best bit is the little bit of lentil liquid, tomato juice, olive oil and lemon juice all gather at the bottom of the bowl just waiting to be scooped up with a warm, crisp flatbread.
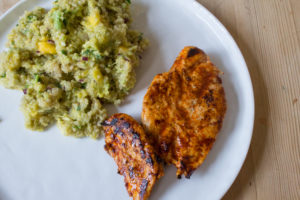
Harissa Chicken with Quinoa, Avocado and Mango Salad
How many times do you think about what to make for dinner and end up with a seemingly impossible list of requirements for that one meal? It needs to be filling, but without being too full of fat, tasty without being too salty or sugary, balanced and preferably something interesting. Welcome to every weekend of my life! Planning meals is something I can’t live without (see post here if you want some top tips) and I usually do it on a leisurely Sunday morning when I have time to look through my blog, magazines and books for inspiration. More often than not I end up fulfilling all the requirements that I want my dinner to be, but it takes time to work it out. So give my Harissa Chicken with Quinoa, Avocado and Mango Salad a go; I’ve done all the hard work for you.
Ingredients
You will need (for two):
- 2 chicken breasts
- 2 tsp harissa paste
- Oil for cooking
- 100g quinoa (this is quite a lot of cooked quinoa, if you’re not feeling very hungry I’d do 75-80g for two)
- 1 avocado, flesh diced
- 1 mango, flesh diced
- 1 small red onion, finely chopped
- 1 small chilli, finely chopped
- Handful fresh coriander, chopped
- Salt and pepper
- 1 lemon
Method
Cook the quinoa according to the packet instructions.
While the quinoa cooks, prepare the avocado, mango, onion, chilli and coriander.
Once the quinoa is cooked, drain and leave to cool slightly. Squeeze over the juice from the lemon and add a little salt and pepper, mix well.
Get a frying pan on a medium heat and add a little oil.
Flatten the chicken breasts with a rolling pin between two sheets of cling film then season each side lightly.
Add the chicken to the frying pan and cook until it’s turning golden brown and just cooked through.
Decant the harissa paste into a bowl then brush it over one side of the chicken breasts, turn over, then brush the other side. They will turn a fantastic colour and the smell is amazing! Let the paste catch slightly on the pan to give everything a smoky flavour. Remove the chicken from the heat.
Mix all the prepared fruit and veg into the quinoa then serve up with the chicken on the side. Drizzle over a little plain yoghurt if you like.
Not only is this (well, I think so anyway) a balanced meal it’s also light, vibrant and full of flavour. It’s filling and it lends itself to so many different adaptations; jerk chicken with brown rice or maybe togarashi steak or salmon with noodles. I can’t think of anything that this harissa chicken and quinoa salad doesn’t have: three of your ‘five a day’, protein, carbs, freshness, flavour and not a lot of fat. And it tastes so good. Brushing the chicken is the best way I have found of getting the harissa paste to keep it’s floral notes and the spiciness when combined with the tropical mango, creamy avocado and fresh raw onion, chilli and grassy coriander is fantastic. This is one of my favourite recipes ever, indeed I am having it for my dinner tonight again. Oh, did I mention, it’s ready in less than 30 minutes. *listens for applause*
Easy White Bean Stew with Purple Sprouting Broccoli
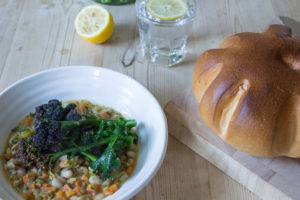
Wholesome food always makes you feel good; it’s made from humble ingredients and is full of good things like beans, vegetables and whole grains. I normally eat slow cooked, what I would describe as wholesome, meals in the autumn and winter but this easy white bean stew with purple sprouting broccoli is the perfect dish for this time of year. It’s quick and easy to make, is full of seasonal vegetables and is absolutely delicious. Using seasonal veg not only makes the best of what’s around but means it’s super cheap to cook up too, feeding four people for around £4.50 (most of what I used was organic too!).
Ingredients
You will need (for two hearty bowls):
- 1 large leek, sliced £0.40
- 2 cloves garlic, finely sliced £0.10
- Olive oil for cooking £0.10
- 2 carrots, diced £0.10
- 2 bay leaves £0.05
- 2 cans cannellini beans, drained £1.30
- 500ml vegetable stock £0.30
- Handful fresh parsley, roughly chopped £0.20
- Purple sprouting broccoli, woody ends removed (4-5 stems each) £1.75
- 1 lemon £0.30
- Salt and pepper £0.05
Total price £4.65
Method
Get a casserole pan on a medium heat and add a little oil. Stir the garlic in and stir briefly before adding the carrots, leek and bay leaves. Add a dash of water (2-3 tbsp is all) then leave everything to soften for around 10 minutes.
Add the beans and stock and then simmer everything for 10-15 minutes with a lid half on.
Fill a pan with a steamer with a little water then get it on to boil.
Check the stew, it should be like a thick soup, you can add a little water if you need to thin it out then season with salt and pepper. Remove from the heat and keep warm. Stir through the parsley.
When the water is boiling steam the broccoli for 2 minutes then remove and squeeze over the juice from the lemon and a good grinding of black pepper.
Serve with nice crusty bread.
This is one of my favourite dishes and one that I can see myself returning to again and again. It’s also vegan, which I realised afterwards so if you’re looking to expand your vegan cooking repertoire then I can recommend this as an excellent place to start! It’s lovely to have the seasonal purple sprouting broccoli as the star of the dish and the acidity the lemon brings cuts through the comfort of the bean stew. I also normally have some sort of white bean in my cupboards and I think it would work with any of them. If you make double the amount it’s also very tasty served as a soup the next day. I would advise serving this with crusty bread so you have something to mop up the juices from the stew.
- « Previous Page
- 1
- …
- 6
- 7
- 8
- 9
- 10
- …
- 16
- Next Page »
