There’s a bit of a miso theme on the blog at the moment. For two reasons: firstly, miso is delicious and secondly, it’s expensive and you have to buy quite a lot. So I needed to use up my stash and I really wanted to have a go at my own miso roasted aubergine. Most of the ingredients used are pretty standard store cupboard staples; I was pretty amazed how much more than the sum of its parts this recipe is. It’s fantastic, if I do say so myself, and my miso glaze and my soy dressing will be making many future appearances in my kitchen.
Sage and Black Pudding Pasta
I imagine that as you read sage and black pudding pasta you’ll fall into one of two camps of people; either the ‘a full English isn’t the same without it’ camp or the ‘I don’t like it’ camp. If you know what goes into making a black pudding I can understand that it doesn’t really help to sell itself: pork blood, pork fat, oatmeal and spices. The spices vary between producers so try out a local one if you can get your hands on it, it’s definitely worth it. Black pudding is such a polarising ingredient but it’s actually pretty cheap meaning it’s perfect for cooking on a budget.
Quince Gin
Having put quinces through their baking paces (adding them to crumbles or baking them with honey) I wanted to see how else I could use them. Steeping them with gin seemed like a logical step; the unique flavour of quince I thought would work really well, and it does. I set about making some quince gin and I made a little film about it too. It’s the first film I’ve made and I have a new YouTube channel too, check it out below!
I love the light golden colour that the finished gin has and the delicious, almost tropical taste, the quince gives. This is just the tipple for cold, dark nights with your thickest slippers and a cosy blanket.
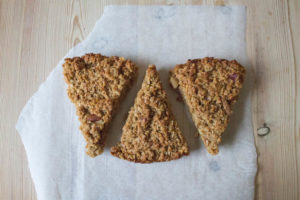
Bramley Apple and Nut Flapjacks
I live in a village and on first appearances it has all the qualities of somewhere straight out of Call The Midwife. Actually living there is quite different; people don’t know each others names, good luck trying to get them to take your bins in for you and there’s so much material competition it’s like a car forecourt out there. Of course there are exceptions; one of which is the white house on the corner. They have a Bramley apple tree and although (this year especially) they don’t get many apples from it they always put a box of windfalls outside their gate for people to take. I helped myself to one of their apples and set about making some Bramley apple and nut flapjacks.
Ingredients
You will need (for 8 big flapjacks):
- 200g butter
- 175g light muscovado sugar
- 70g golden syrup
- 70g honey
- 350g rolled oats
- 1 Bramley apple, grated
- 75g mixed nuts, roughly chopped
Method
Melt the butter, sugar, syrup and honey together in a large pan over a low heat. Make sure it’s all mixed together well.
Add the oats, apple and nuts to the butter mix and stir together to ensure everything is coated in the butter and syrup.
Preheat an oven to 160C. Tip the flapjack mix into a tin.
Note – I used a round, silicone ‘tin’ so I didn’t need to grease it but if you’re using a metal one you might want to lightly grease it before adding the flapjack mix. The larger the tin you use, the crunchier the finished flapjack so choose your tin on your flapjack preference!
Bake the flapjack for 30 minutes. Remove from the oven and mark into pieces. Leave to cool before removing from the tin.
Originally I wanted to make these flapjacks with cobnuts (wild hazelnuts) but there don’t seem to be many around this year, or the squirrels have got to them all. If you do have some of your own I think they’d be fantastic added to this mix. These flapjacks are perfect at this time of year; they are so autumnal I couldn’t imagine making them in any other month. The Bramley apple adds a little bit of sharpness and a slight cakey texture and the mixed nuts bring a delicious crunch; the ones on the top get lovely and toasted during baking too. If you don’t have a village supply of Bramleys to help yourself to, there are plenty of wild apples around at the moment which would certainly be worth a try.
Lentils and Chard
There’s always a pack of lentils in my kitchen cupboards. Sometimes more than one; the quick cooking red variety to throw into soups, the big fat yellow ones for making dahl and the more elegant puy for making a wholesome side dish or salad. The mealy, earthy taste and texture that comes from a lentil is part of its charm; the fact that they are so humble but so versatile and filling is why I always find myself with lentils on my plate at least once a week. This dish of lentils and chard was served alongside some simply griddled chicken but it was so good that I think it’s perfect as a meal on its own.
Lemon Iced Tea
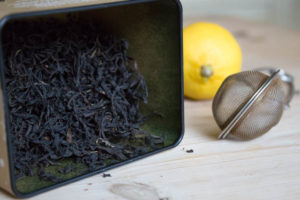
Sometimes I make something for the first time and I wonder why it’s taken me so long to get round to it. Iced tea is one of my favourite drinks, especially lemon iced tea, but other than a passion fruit and jasmine version I concocted a few years ago I’ve not made my own since. I wanted to make some to take on a recent picnic as I thought it would be nice and refreshing in the late summer sun. Considering this only uses three ingredients, I used the very best ones I could: all organic and the tea I used had the wonderfully, British, charming name ‘Georgian Old Gentleman’.
Ingredients
You will need (for around 500ml):
- 3 tsp loose tea leaves
- 3 thick slices of lemon (organic if you can, otherwise you get a faint oiliness on the top of the tea when the wax melts off the lemon rind)
- 2 dsp caster sugar (organic if you can so it’s unrefined for a delicious caramel taste)
Method
Start by making the tea. Put three nice big teaspoons of tea into a pot (or heatproof jug) and add 500ml boiling water. Leave to steep for around five minutes before removing the tea leaves.
I have a snazzy teapot which makes the above stage very easy: I simply remove the middle of the teapot which contains the tea leaves. If you don’t have one of these just strain the tea through a sieve or tea strainer into another jug or teapot.
Add the lemon and leave everything until it has cooled.
Remove the lemon slices then stir in the sugar until it’s dissolved.
Cool in the fridge and then serve over ice. Or, as I did, pour it into a Thermos to keep cool and take it on a picnic.It was as refreshing as I hoped it would be and it had the most fantastic unique twang because of the tea that I had used. Just the ticket to sip while sat on a log enjoying a picnic. I’ll definitely be playing around with different fruits and teas to experiment with lots of different flavours. I can’t believe how ridiculously simple it was to make; why has it taken me so long to make it again? I love that you can add the amount of lemon, tea and sugar that suits you. The recipe above is much less sweet than ready made iced teas that you can by, and that’s how I like it.
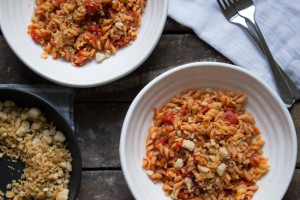
Spicy Tomato Fusilli with Garlic Pangrattato
The next pasta recipe up my sleeves is a super quick one; ideal for a midweek meal you need in a hurry but still want it to be tasty too. My Spicy Tomato Fusilli with Garlic Pangrattato takes less than thirty minutes from fridge to plate, is super cheap and great at using up odds and ends you may already have in the fridge and cupboards.
You will need (for two):
- 175g pasta (I used fusilli)
- 1 can chopped tomatoes
- 1 small onion, finely chopped
- 1 chilli, diced (I used a jalapeño but use whatever you have)
- Oil for cooking
- Salt and pepper
- 1 slice stale white bread
- 2 tbsp olive oil
- 2 large garlic cloves, crushed
Heat a little oil in a saucepan on a medium heat and add the onion. Fry for 10 minutes, stirring occasionally.
While the onion cooks blend the bread in a food processor until you have breadcrumbs.
Add the tomatoes and chilli to the onion with a little seasoning and simmer for 15 minutes until thickened.
While the tomatoes simmer cook the pasta in a large pan of boiling water. At the same time put a small frying pan on a medium/high heat and add the olive oil and breadcrumbs. Fry, stirring frequently, for five minutes before adding the garlic and continue to stir until the garlic is very lightly brown and the crumbs are toasted.
Drain the pasta when cooked then mix the spicy tomato sauce into the pasta. Serve up and top with the garlic pangratatto.
Frying the onion gently is key to giving this dish a little sweetness to complement the slightly acidic tomatoes and the heat from the chilli. I love the crunch and crispness that the pangrattato gives, along with a good hit of garlic. It’s a great recipe to use up a bit of old bread, a tin of tomatoes and other bits and bobs to leave you with a nice cleared out fridge. If only it worked out that well every week!
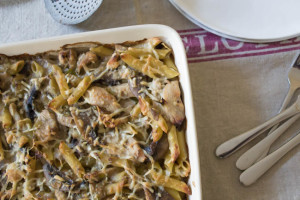
Creamy Chicken, Leek and Mushroom Pasta Bake
This is the first of a series of recipes aimed at giving you a few new ideas for the next time you’re after pasta for dinner. I’m sure I am in the majority of people who eat pasta at least once a week. And why not? It’s a carbohydrate that goes with everything and sometimes is at its best simply served with butter and cheese; because you chose to not because the fridge is empty. Of course. The first of these new pasta recipes is for Creamy Chicken, Leek and Mushroom Pasta Bake.
You will need (for four):
- 2 small chicken breasts, diced or in strips
- Oil for cooking
- 2 medium leeks, washed well and sliced
- 4 portabello mushrooms, wiped and sliced
- 2 garlic cloves, crushed
- 350g pasta (I used penne)
- 125ml chicken stock
- 150ml single cream
- Salt and pepper
- 30g Parmesan cheese, grated
In a large frying pan heat a little oil over a medium heat. Add the chicken and fry until cooked through and lightly golden brown. Remove the chicken from the pan and keep to one side.
Put the pan back on the hob and reduce the heat slightly. Add the leeks and cook for around 10 minutes until softened. Add the garlic and the mushrooms and continue to cook for a further 10 minutes or until the moisture has come out of the mushrooms and they have shrunk slightly.
Add the chicken back into the pan with the stock, cream and a pinch of salt and pepper. Simmer gently for around 10 minutes until the mixture is slightly thickened.
While the chicken mixture is reducing cook the pasta in a large pan of boiling water for 8-10 minutes, drain when cooked al dente.
Preheat an oven to 180C. Mix the pasta into the chicken mixture and ensure everything is coated with the sauce. Tip the mixture into an ovenproof dish and scatter the Parmesan over the top.
Bake for 20 minutes until the cheese is golden.
Pasta bakes have to be up there amongst my favourite comfort foods. I made enough of this for four people and kept half for the next day; it makes delicious leftovers. There is just enough sauce to make sure everything is coated but not too much that it’s swimming in cream; the mushrooms and leeks are earthy and full of flavour and the chicken works really nicely with these classic flavours. I think it would work with leftover roast pork too.
Blackberry and Pear Pavlova
This is only my second pavlova. To me, meringue has always been steeped in mystery and wonder and I found it slightly intimidating. Crispy on the outside, gooey in the middle; is this all really achievable with just two ingredients? Well yes, turns out it is. My two attempts I couldn’t have been more pleased with; previously a summer berry version and this time my Blackberry and Pear Pavlova (which also happens to be all organic) and the pudding portion of my #thriftyorganic challenge.
You will need (all ingredients organic):
- 3 egg whites,
- 150g caster sugar,
- 1 pear, diced,
- 1 punnet blackberries (not organic, they’d run out!),
- 2 tbsp water,
- ½ tbsp caster sugar,
- 150ml double cream,
- vanilla extract (not organic)
Whip the egg whites (in a mixer, with an electric hand whisk or by hand if you’re feeling strong) until soft peaks form. Then continue whisking adding the sugar (150g) a little at a time until glossy stiff peaks form.
Preheat the oven to 140C and spread the meringue onto some greaseproof paper in a rough circle. To keep the fruit and cream contained when you assemble it all later it can be useful to make the meringue slightly bowl like in shape so it’s slightly higher at the edges.
Place in the oven for an hour then turn the oven off and leave the meringue in for a further hour. Remove and leave to cool.
While the meringue is cooking put the pear, blackberries, remaining sugar and water in a pan and cook gently until most of the water has evaporated (some will come out of the fruit) and it’s all glossy. Leave to cool.
Once the meringue is cooled whip the cream with the vanilla extract until thick then spread on top of the meringue.
Top with the fruit and serve.
Using organic sugar (which is golden) gives the meringue a lovely toasted light brown colour which I really like. I don’t add sugar to the cream as the vanilla extract adds a little bit and the meringue is sweet enough; the fruit is a fantastic purple colour and adds a nice bit of tart freshness. I think pavlova is a great dinner party dessert as it’s sweet without being too heavy and I think it looks good but you’ve put in minimal effort: win!
Review: What to Bake and How to Bake It. Buttermilk Pound Cake
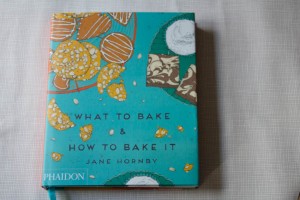
I was sent What to Bake and How to Bake It to review and I was really looking forward to having a flick through the pages to see what to bake. I knew it would be a fab book from the quick look I initially had but I wasn’t quite expecting it to be such the joy that it was. The quirky cover makes it stand out amongst the other books on my shelves and I liked the colours and illustrations. There are two key things I noticed about the book which I love: firstly, Jane provides pictures right at the start showing you exactly what butter and sugar look like when perfectly creamed (and if they’re over beaten) amongst other techniques, secondly, she doesn’t assume you have a microwave. I don’t have a microwave and it’s amazing how many cookery books assume you have one (I think I’m in the minority but still!). The book is published by Phaidon and they kindly said I could publish one of the recipes so I tried my hand at the Buttermilk Pound Cake.
Ingredients
You will need (for one pound cake):
- 175g butter, softened and extra for greasing
- 175g caster sugar (I used golden as I prefer the flavour)
- 3 eggs (I used large)
- 1 tsp vanilla extract
- 225g plain flour
- 1/2 tsp bicarbonate of soda
- 1/2 tsp baking powder
- 1/4 tsp salt
- 120g buttermilk
Method
Grease a 23 x 12 loaf tin and line with baking paper. Preheat an oven to 180C. Beat the sugar and butter together until very creamy and pale. (I’m always surprised how long it takes to do this but I think it’s because my butter is never warm enough!).
Mix the eggs together well then beat into the butter mix a little at a time. Beat in the vanilla.
Stir together the flour, baking powder, bicarbonate of soda and salt then fold half of it into the egg and butter mixture. Fold in the buttermilk then fold in the remaining flour to make a smooth, thick batter.
Scrape the batter into the tin then bake for 30 minutes then turn the oven down to 160C and bake for a further 20-25 minutes. Check the cake is cooked by inserting a skewer into the middle, it should come out clean. Remove from the oven and leave to cool before removing from the tin and leaving to cool completely on a wire rack.
I was pretty pleased with how my cake came out, it even cracked along the top like it’s supposed to! Every recipe is accompanied by step by step photos and instructions which make the book easy to use and follow. There’s a huge mix of recipes; fudgy cheesecake brownies, celebration cakes and breads and they all seem achievable next to Jane’s words of wisdom! The Buttermilk Pound Cake I made had a fantastic vanilla flavour with a very slight sourness and the texture was great too. I know I’ll be baking again from the book after this success!
What To Bake and How To Bake It is written by Jane Hornby and is published by Phaidon. Available in Hardback for £19.95.
Thank you to Phaidon for the book and for allowing me to publish the recipe. All opinions and words expressed are my own.
