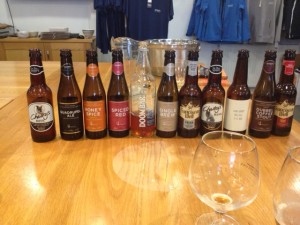
After we had seen the whole process we were able to try some of the bottled beers; 11 in total we tried on our visit. It was similar to wine tasting with the water swishing out in between each one. The photo shows the beers we tried from our favourite (on the left) to the ones less for us (on the right). The range of colour and flavour between them was remarkable; from light and citrusy to deep and honeyed. For someone who used to think all beer tasted the same this was eye opening.
The best bit was when they brought out the chocolate. The two bars of chocolate have been created specially to pair with the Honey Spice beer (white chocolate with lemon meringue) and the Quadrupel (70% dark chocolate). Beer and chocolate I tried in Bruges but it was beer that had the chocolate (or flavour) in it. This was different, not least because the chocolate had other flavours, but because you could make it as strong or faint in chocolate flavour as you liked by nibbling.
One of the more intriguing beers was one called Land Shrimp. I kid you not when I tell you that it was made with woodlice, hence the name. It was quite a bitter beer I thought but I couldn’t tell you if that was down to the woodlice or not. Apparently you can add almost anything to beer!
Cider making at Ciderniks
I prefer cider in either hot weather so I can have it nice and cold, or when it’s cold outside so I can have it nice and warm. How do you prefer yours? There seems to have been much more interest recently in cider with lots of new brands popping up so it was great to have a chance to see behind the scenes with a cider maker himself. Ciderniks is a small cider maker based in Kintbury and Nick opened up his cider making empire for the curious to have a look around.
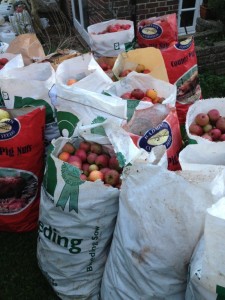
Nick’s garden was absolutely full of bags of apples; some from here, some from there but he knew where each bag had come from. It was remarkable how many apples he already had with the promise of more on the way. It was also very surprising how much juice each bag will give you; I thought it would have been a lot less.
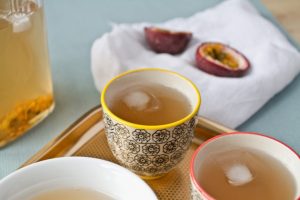
Passion Fruit and Jasmine Iced Tea
Ingredients
You will need (for around 1 litre):
Review: Puro Coffee
I have to admit that I had never heard of Puro until they got in touch. That’s because you normally find their coffee in Gourmet Burger Kitchen or The National Trust. Puro have a great attitude towards the environment and the rainforests and all their coffee is fair trade and organic. For every cup of coffee sold money goes back into protecting the rainforests in South America.
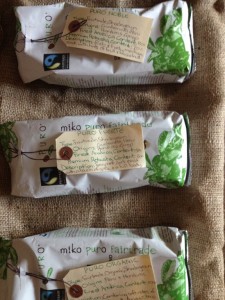
We weren’t sure which coffee to try first so we went with Puro Fuerte. This is a 50:50 blend of Arabica and Robusta coffee beans from Guatamala, Peru, Honduras and Congo. I thought this one had a deep coffee flavour that was smooth and rich. This blend was my favourite of the three.
A Trip to Bruges
We had a great little guide book to the city and based our trip around that. Our hotel was a five minute walk from the station and about ten minutes from the city centre; to get to the centre was either through a park or cobbled back streets, each equally as picturesque.
One of the places I really wanted to visit was Cambrinus; a wooden and stained glass window bar which serves 400 different beers. I didn’t think I liked beer, after my trip to Bruges it turns out I do. We managed to sample 20 different beers between us in three days; good for the taste buds, bad for the belly.
The picture above shows the massive beer menu (left), the Delerium tasting beer selection (middle) and a passion fruit beer (right) with cheese and meat that you can order to nibble on.
Damson Gin with Lemon and Lime
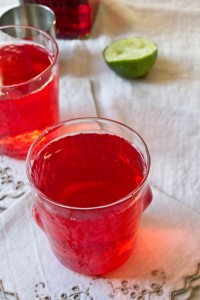
It’s nice to have a cupboard full of foraged wares. Currently I am housing sloe port made with sloes that were steeping in gin for two years, a nine month damson gin and I am now using the gin soaked damsons to kick off a batch of damson port. I’ve been busy. As nice as it is to sip the damson gin like a thin fruity syrup it’s also nice to be able to jazz it up sometimes.
After nine months of steeping the damson gin has come out a glorious, deep, rich red colour and it is asking to be made into a long drink. This is my perfect summer evening tipple. If I don’t have lemonade in the house it is just as good with a bit of tonic. It doesn’t look fancy, it’s not got any frills but when it tastes this good and fresh it doesn’t need any.
Strawberry, Mint, Elderflower and Gin Cocktail
Ingredients
You will need (for two long cocktails):
- Around 150g strawberries
- A few mint leaves
- 100ml gin
- 50ml elderflower syrup
- Tonic or soda to top up
Method
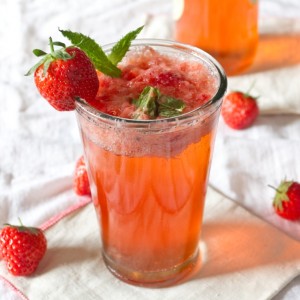
Remove the green bits of your strawberries and put them into a large glass or jug with the mint leaves. Bash, bruise and beat the strawberries and mint together until well muddled. I thought it looked and smelled pretty good at this stage without anything else added. I was surprised how much juice came out of the strawberries.
Add the elderflower syrup and gin and mix together. Pour this into two tall glasses and top up with tonic or soda. Be careful when you top the glass up as when I topped up with tonic the slushy fruity bit started to froth out over the top. Slowly but surely was my friend for topping this up. Add a few fresh mint leaves and a strawberry to the glass if you’re feeling adventurous.
Coffee and Chocolate Shortbread
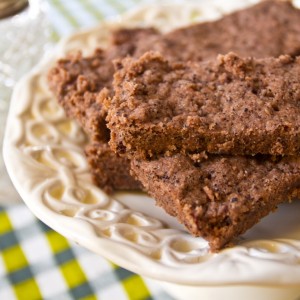
Kopi sent me some coffee and instead of making a mug of coffee and telling you about it I wanted to mix it up in something tasty! I like the idea of Kopi coffee; you sign up and get a different coffee sent to you each month. I was sent Sumatra Aceh Organic and it was deep and smooth with a little hint of bitterness but not too much. It formed a distinct crema layer on top with no effort on my part; I’ve been told a good crema is the sign of a good coffee.
Ingredients
You will need (for 12 fingers):- 180g plain flour
- 1 tbsp cocoa powder
- 50g caster sugar
- 150g softened butter
- 40g dark chocolate, finely chopped
- 10g ground coffee
Method
Preheat your oven to 160C and grease a baking dish; I’ve used round, square and rectangular for this mixture before and all work well.
Cocktail Making at Lola Lo Oxford
I must start by apologising for the photos; I was having too much of a good time (and had my cocktail goggles on) while I was there to think about it! I also have to tell you that our hosts Annie and John were wonderful; I arrived a little late and out of breath and they didn’t mind at all. In fact I was presented with a glass of Champagne and a flower necklace to wear.
I wasn’t quite sure what to expect from a cocktail class, I thought it would be mostly watching but actually it was really hands on. We set about making three cocktails. They were demonstrated by John first, we tasted it and then he watched us make our own versions. I was so surprised at what a difference a small amount of gomme or lime can make to the overall flavour of a cocktail. Just a dash too much gomme can transform the cocktail from balanced to overly sweet. At the same time, if your biceps aren’t up to squeezing out enough lime juice the sourness can change astoundingly. The first cocktail we made was a Mai Tai; a mix of rum, Cointreau, lime juice, almond syrup and gomme. The balance of sweet to sour was great in this and I was really surprised how much I enjoyed the almond flavour. The next cocktail (served in the blue figure) was a Moai; rum, Cointreau, lime, grenadine, Angostura bitters and ginger beer. Again I was really surprised by the mix of flavours as I don’t normally like ginger beer but I really liked this mix. The last cocktail we made was the Captain Coconut; rum, coconut liqueur, passion fruit, lime, gomme, cream of coconut and peach liqueur. I loved this one because it was served in a frozen coconut! The tropical flavours were enhanced by the furry receptacle. All of the cocktails we made were ones I wouldn’t normally order but after trying them I definitely would. I was feeling very pleased with myself thus far. I hadn’t spilt anything on myself (or anywhere else), everything I had made was delicious and I was a little bit tipsy. I thought it was all over and I was happy with what I’d learned, but no. Off we went around the corner and there was a table full of spirits, mixers, ice and all sorts for us to invent our own cocktails. I’m not a competitive person, unless food or cooking is involved. I thought this was a great end to the evening; a chance to utilise all your acquired cocktail knowledge. Although when you’ve already had three cocktails your powers of concentration and reason are somewhat inhibited. We had to make one short cocktail and one long cocktail. My short cocktail was a mix of gin, apricot brandy, lime and grenadine. My long cocktail was a mix of rum, strawberry liqueur, lime and apple juice. The jury was out on who had won (I’m pretty sure it was me) but it was easier to keep the peace!Now, I know I wasn’t actually in Polynesia during the master class but I felt a million miles away from the hustle and bustle of the Oxford city streets above. I might come across as a bit ignorant now but I had no idea about the history of all cocktails. I thought they were a relatively recent thing but with this class not only do you learn how to make the cocktails but you learn the whole story behind them to. My particular favourite being the story of the Long Island Iced Tea (one of my preferred cocktails) which came about when clear spirits were mixed with cola and poured from a teapot during a period of prohibition. I really enjoyed the class and think it’s a great idea for a party or if you want to get to know a bit more about mixing up drinks.
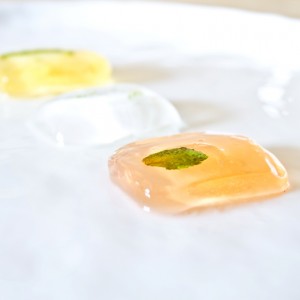
Gin and Tonic Mini Jellies
Ingredients
You will need (for around 12 mini jellies):- 30g sugar
- 50ml water
- 120ml pre-mixed gin and tonic
- 3 sheets gelatine
- Decorations of your choice (e.g. herbs or zests)
You may have noticed that I have three different coloured jellies. Indeed, not only was this an excuse to get out my calculator and work out gin to tonic to gelatine proportions but also a good reason to try out my new jelly mould and gins. The proportions above are for 12 jellies in total of around 10g each; feel free to mix up whatever spirits you have just divide the total gin and tonic amount by the amount of flavours you want to try and make different batches.
Method
Best to get the mathematics out of the way before you start your jelly making just in case you feel the need to make and drink a G&T at the same time. Not that I did of course. First of all put your decorations of choice into the jelly mould and go about selecting your gin. I went for: Sloe Gin and Mint, Saffron Gin and Cucumber and Gin and Lime Zest.Put the sugar and water into a pan to dissolve the sugar and then bring to the boil. While the sugar and water are heating put the gelatine into cold water. Once the sugar syrup has boiled remove from the heat, squeeze the excess water from the gelatine and stir the gelatine into the syrup until dissolved. Pour in the pre-mixed gin and tonic and stir gently so that you retain some of the fizz. Pour the jelly mix into your jelly mould and refrigerate until set. I like knowing that if you dissolve five sheets of gelatine into 500ml of liquid it will set to a decent quiver so I upped my gelatine to liquid ratio to make these thicker and more like adult gummy bears.
