• Facebook
  • Instagram
  • Pinterest
  • Twitter

All That I'm Eating

Recipe ideas for budget meals, everyday cooking and a little indulgence. Travel inspiration and restaurant reviews too.

  • Home
  • Recipes
  • Wild Food
  • Events & Reviews
  • Travel
  • About Me
  • Contact Me

Store Cupboard Shortbread

January 16, 2020 By All That I'm Eating 16 Comments

Shortbread in tin

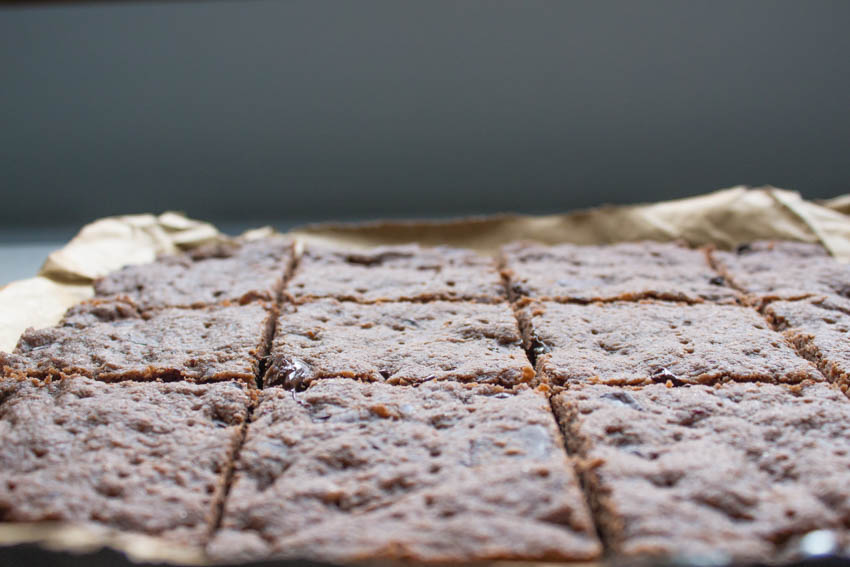
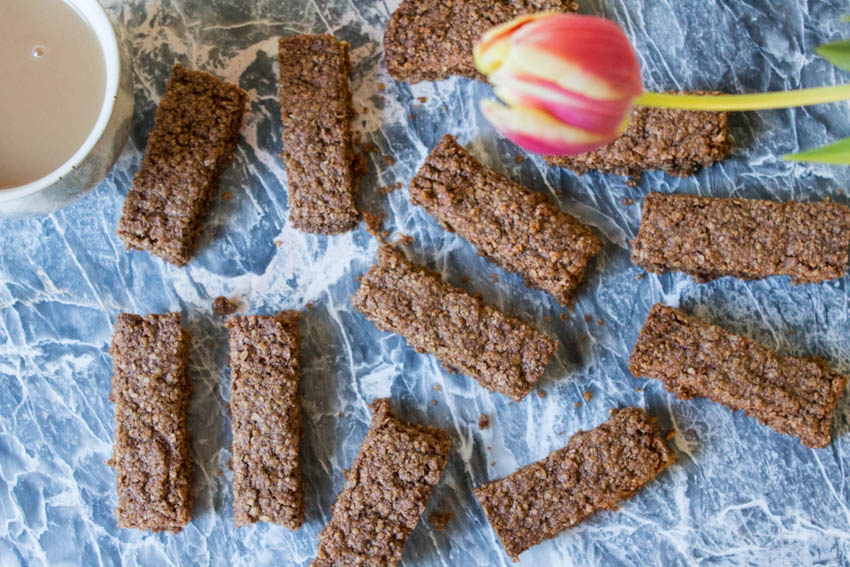
I often find that I buy nuts or seeds to make something particular and I get left with a few grams of them here and there. That’s where my store cupboard shortbread comes in. This year I am attempting to use up ingredients in my cupboards and I thought I would start by using the last few dregs of cocoa powder and some leftover hazelnuts; I am so glad I did.

Ingredients

Makes 12 pieces of shortbread:

  • 175g plain flour
  • 1 tbsp cocoa powder
  • 50g caster sugar
  • 150g butter, softened
  • 50g chopped nuts, chocolate or seeds

Method

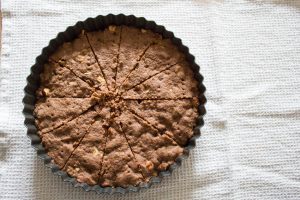
Grease a loose bottomed tart tin, mine was 20cm. Preheat an oven to 160C.

Add all of the ingredients to a bowl or food mixer and beat together until you get a ball of dough. read more

Filed Under: Baking, Biscuit, Butter, Chocolate, January, Nuts & Seeds, Recipes By Month, Seasons, Shortbread, Store Cupboard, Winter Tagged With: Baking, Biscuits, Chocolate

Banana Bread with Chocolate, Oats and Honey

October 24, 2018 By All That I'm Eating 10 Comments

banana bread with chocolate, oats and honey

You know those bananas that you keep avoiding in the fruit bowl? The ones which got a bit speckled a few days ago and now are fully fledged brown? Well, throw out your normal go-to recipe because my banana bread with chocolate, oats and honey is the way to go. Adding a few extra ingredients gives it a delicious flavour and texture and I have been very much enjoying having a slice for breakfast each morning. Any excuse to start the day with chocolate.

ingredients

You will need (for one banana bread loaf):

  • 125g butter
  • 3 medium overripe bananas
  • 2 eggs
  • 100g honey
  • 75g caster sugar
  • 250g plain flour
  • 2 tsp baking powder
  • 75g oats, plus a few extra
  • 100g dark chocolate, broken into small pieces

method

Grease and line a loaf tin and preheat the oven to 160C.

Melt the butter and honey together in a small saucepan and stir to ensure they are well combined.

Mash the bananas in a large bowl then pour in the butter and honey and crack in the eggs. Whisk everything together well.

Sift the flour, sugar and baking powder into the banana mix and fold everything in gently. Stir in the oats and most of the chocolate chunks.

Pour the mix into the prepared tin and then sprinkle the extra oats and leftover chocolate over the top.

Bake for an hour, then check on the loaf to see if a skewer comes out clean when inserted in the middle. If not, keep baking and checking it every 5-10 minutes until fully baked.

Leave the loaf to cool in the tin for a few minutes before removing and leaving to cool on a wire rack.

The oats on top of the banana bread have a lovely toasted flavour and the oats inside the bread swell up and have a deliciously chewy texture. Who can resist a slice of warm banana bread? It’s even harder to resist when you know it’s covered in and is full of melted chocolate. Dark chocolate is definitely the best choice for this as it works so well with the sweetness from the bananas, sugar and honey. The honey gives the cake a beautiful mellow flavour and slight sticky texture. If your banana bread lasts a few days and you want to freshen it up, try lightly grilling or microwaving it and serving with plain yoghurt. Honestly one of the best breakfasts imaginable.

Filed Under: Autumn, Baking, Banana, Breakfast, Butter, Cake, Chocolate, Dairy & Eggs, Eggs, Fruit, Honey, Oats, October, Recipes By Month, Seasons, Store Cupboard Tagged With: Baking, Chocolate, recipe

Strawberry and Peanut Tart

August 1, 2018 By All That I'm Eating 12 Comments

Strawberry and Peanut Tart

Minimum fuss and maximum results were the name of the game with my most recent dessert. Another hot day, the last thing I needed was to be baking pastry, so I didn’t, but made a tart nonetheless. My Strawberry and Peanut Tart makes use of a few sneaky kitchen shortcuts to make a delicious and impressive pudding. A chocolate and peanut base smothered with cream and stacked high with fresh fruit it almost seemed a shame to cut into it. But, you know, someone had to.

Ingredients

You will need (for 6-8 servings):

  • 180g dark chocolate digestives
  • 2 heaped tbsp peanut butter
  • 3 tbsp salted butter
  • 300ml double cream
  • 150ml low fat Greek yoghurt
  • Strawberries and cherries (or other berries)
  • 2 tbsp peanuts

Method

Start by heating the peanut butter and butter together in a small pan on a low heat. Stir from time to time until melted and mixed together.

Add the digestive biscuits to a bowl and then smash them up with the end of a rolling pin until you have a breadcrumb texture. Pour over the melted peanut butter and butter and mix together well.

Line a 20cm spring form cake tin then tip the biscuit mix into the tin, spread out over the base and flatten the top using the back of a spoon.

Refrigerate for an hour minimum, longer if you have it.

Prepare the fruit; chop the green bits off the strawberries, stone the cherries if you like, and put to one side.

Add the peanuts to a small, dry frying pan and heat on medium to toast the peanuts. Remove from the heat when lightly golden and smelling marvellous then crush in a pestle and mortar or in a bag with a rolling pin.

Whip the double cream until you have firm peaks. Gently fold the yoghurt through the cream.

Remove the base from the fridge and put onto a large plate. Pile the cream on top of the base and then top with the fruit. Sprinkle over the crushed peanuts.

This was one of those desserts that was so satisfying to cut through with a knife. Firstly you have to move it through the heavy fruit into the fluffy cream, then you meet a little resistance at the base with a very satisfying chink when knife meets plate. The dark chocolate in the digestives gives a hint of chocolate throughout the tart without being too overwhelming and the peanut taste in the base mirrored by the peanuts over the top brings a great taste and texture. Adding the yoghurt to the cream not only makes the cream go further without adding any extra fat but also gives a nice tang and freshness to the whole dessert. Juicy strawberries and cherries made a fantastic topping for this but any berries would work well too.

Filed Under: August, Baking, Cherry, Chocolate, Cream, Dairy & Eggs, Fruit, Pudding, Recipes By Month, Seasons, Strawberry, Summer, Tart, Yoghurt Tagged With: Chocolate, pudding, recipe, strawberry

Chocolate, Thyme and Lemon Shortbread

April 2, 2018 By All That I'm Eating 10 Comments

chocolate shortbread after the baking

Adding herbs to bakes and drinks is something I really like to do. I like the botanical flavour that herbs can bring to various dishes and I think woody herbs really suit being paired with chocolate. These chocolate, thyme and lemon shortbread biscuits are a delicious combination of flavours if I do say so myself and if you’re unsure about adding herbs to a biscuit you’ll just have to give it a try!

Ingredients

You will need (for 12 squares):

  • 180g plain flour
  • 1 tbsp cocoa powder
  • 50g caster sugar
  • 150g softened butter
  • 50g dark chocolate, finely chopped
  • 1tsp dried thyme
  • Zest 1 lemon

Method

Preheat your oven to 160C and line a baking dish; I used a square one for this batch but round or circular dishes work just as well.

Put all of the ingredients into a large bowl, or mixer, and beat together until they form a dough. Remove from the bowl and knead lightly.

Press the dough into the tin, spreading it out evenly, then prick the top of the shortbread with a fork. Bake for 45 minutes.

Remove from the oven, mark into squares then leave to cool before removing the biscuits from the dish.

You can’t go wrong with a dark chocolate shortbread biscuit, and that’s certainly the case when they’re served warm from the oven. The added thyme gives a little warmth and herbal note which coupled with the fresh, zesty lemon is just the thing with a cup of tea. Dried thyme works well in this as I think the oils in fresh thyme might taint a little as it gets baked in the oven. I have previously tried a similar combination of flavours with my chocolate, rosemary and hazelnut biscuits. I would like to try infusing some bay with a white chocolate mousse or sauce at some point in the future too.

Filed Under: April, Baking, Biscuit, Butter, Chocolate, Herbs, Lemon, Recipes By Month, Seasons, Shortbread, Spring, Thyme Tagged With: Baking, biscuit, Chocolate

Peanut Butter and Raspberry Brownies

September 6, 2017 By All That I'm Eating 12 Comments

peanut butter brownies out of the oven

I’m not sure these Peanut Butter and Raspberry Brownies need an introduction; just the name gets my mouth watering and a hankering for a piece with a coffee shortly follows. I’ll be honest from the outset, these are not exactly what you’d call healthy. They are full fat, properly indulgent, to-hell-with-it brownies. And frankly, when you’ve been working hard all day coming home to one of these and a cuppa is like a hug for the soul. A gooey, chocolatey, nutty…stop it…slice of comfort.

Ingredients

You will need:

  • 100g salted butter
  • 170g golden caster sugar
  • 50g light muscovado sugar
  • 100g dark chocolate, broken into pieces
  • 1 1/2 tbsp golden syrup
  • 2 eggs
  • 100g self raising flour
  • 2 tbsp cocoa powder
  • 150g crunchy peanut butter
  • 100g fresh raspberries

Method

Grease and line a 9 inch square cake tin. Preheat an oven to 180C.

Add the butter, sugars, chocolate and golden syrup to a saucepan and melt over a low heat. Stir occasionally until everything is melted and well combined. Remove from the heat and leave to cool a little.

Beat the eggs in a bowl then add the melted chocolate mixture.

Sift the flour and cocoa powder into the bowl and then fold through the mixture. Stir through half the raspberries.

Tip the brownie mix into the tin. Dollop the peanut butter over the top then swirl this through the brownie with a skewer. Top with the remaining raspberries.

Bake for 30 minutes.

Remove from the oven and leave to cool slightly before removing and cooling on a wire rack. Mark into portions when cold.

The raspberries on the top have a completely different texture to the brownies inside the mix; a lovely acidic, fresh contrast to everything that’s going on around it. Chocolate brownie wise you’re looking at a cakey on the outside, gooey in the middle kind of situation; full of the richness from the dark chocolate and cocoa and just sweet enough. Using crunchy peanut butter means they have a wonderful additional crunch and texture. As autumn creeps up on us these will give you as much warmth as any blanket. If you’re loving the look of these brownies, perhaps you might be interested to try my Chocolate Fudge Cheesecake Brownies (yes, you read that correctly) or my White Chocolate and Blackcurrant Blondies.

If you find yourself in the awkward situation that I did where there was one peanut butter and raspberry brownie left and two people wanting to eat it I have an excellent plan for such an occurrence. Take two bowls and scoop some vanilla ice cream into each one, warm the brownie up slightly, then divide warm brownie between bowls. Thank me later.

Filed Under: Autumn, Baking, Berries, Butter, Cake, Chocolate, Dairy & Eggs, Eggs, Fruit, Raspberry, September Tagged With: Baking, brownie, Chocolate, recipe

Dark Chocolate Orange and Pistachio Biscuits

August 16, 2017 By All That I'm Eating 16 Comments

Decorating chocolate pistachio biscuits

I do love the expression ‘fart-arsing around’. When it came to making and decorating these dark chocolate orange and pistachio biscuits I wasn’t going to be fart-arsing around with any of it. An all in one biscuit dough means it’s easy to mix and haphazard throwing around of melted chocolate makes the decoration a breeze. No dunking of biscuits in chocolate for the perfect edge, no placing of individual caramelised pistachios with tweezers and you know what? I think they taste all the better for it.

Ingredients

To make around 16 biscuits:

For the biscuits:

  • 225g butter, softened
  • 50g dark chocolate with orange, grated
  • 275g plain flour
  • 75g light muscovado sugar

To decorate:

  • 50g dark chocolate with orange
  • Small handful shelled pistachios

Method

Throw all the ingredients for the biscuits into a mixer and beat until you have a smooth dough. You can do this by hand if you don’t have a mixer. Whichever way you do it you need to make sure the butter is very soft.

Preheat an oven to 200C. Lightly grease two baking trays.

Flour your worktop and a rolling pin then tip the dough onto the floured surface and roll it out until it’s about half a centimetre thick.

Using a seven inch biscuit cutter cut out as many biscuits as you can and place onto the prepared trays. Gather up and re-roll the dough to cut again and repeat until all the dough is used up.

Bake in the oven for 10-12 minutes or until lightly golden.

Leave to cool slightly before transferring to a wire rack.

Melt the chocolate; either in a bowl over simmering water (being careful not to let the bowl touch the water) or microwave, whichever is your preference.

Blend the pistachios in a food processor or finely chop them.

Spread, dunk, drizzle and brush the chocolate over the biscuits whichever way you wish and then while the chocolate is still melted sprinkle over the pistachio nuts so they stick.

I really like how the biscuits have a speckled effect through them thanks to the grated chocolate. It also means that if you get a bit impatient with the grating, not naming any names *ahem*, then the larger chocolate chunks are a lovely little treat. The orange is really subtle in these but I like that as it lends a delicate rather than overpowering flavour, you could add a little grated orange zest if you wanted to. Green pistachios are always nice to look at; they stand out really nicely against the dark chocolate background and give a fantastic extra texture. These dark chocolate orange and pistachio biscuits are so simple to make and, I can only speak for three days so far, keep very well in an airtight container.

Filed Under: August, Baking, Biscuit, Butter, Chocolate, Dairy & Eggs, Nuts & Seeds, Recipes By Month, Seasons, Shortbread, Store Cupboard, Summer Tagged With: Baking, Chocolate

Double Chocolate and Orange Cookies

March 4, 2017 By All That I'm Eating 23 Comments

Double Chocolate and Orange Cookies

After double, these cookies could only be improved by making them triple; perhaps a drizzle or dunk of white chocolate on each. As they stand however, my Double Chocolate and Orange Cookies are just splendid as they are. Especially straight from the oven. The smell as they bake is hard to beat. I like to use dark chocolate when making cookies as sweet as these because I think it adds some welcome bitterness. When it comes to rolling the cookies, for reasons I am not sure of, I always seem to manage to end up with thirteen; a perfect baker’s dozen.

Ingredients

You will need (for thirteen, or fourteen if you prefer, cookies):

  • 100g margarine
  • 150g butter
  • 250g light muscovado sugar
  • 2 eggs
  • 325g plain flour
  • 2 tbsp cocoa powder
  • 1/2 tsp baking powder
  • Pinch salt
  • 100g dark chocolate with orange, broken into small pieces
  • Zest 1 large orange

Method

In a mixer (or by hand if you’re feeling strong) cream the margarine and butter together then add the sugar and continue to mix together until light and creamy. Don’t rush this step, it’s important that the butter and sugar get properly fluffy.

Whisk the eggs together in a small bowl then add these to the butter mix (with the mixer going) a little at the time until combined.

Sift the flour, cocoa powder and baking powder together then gently mix this into the dough with the salt.

Mix the chocolate and orange zest into the dough then refrigerate for around 30 minutes.

Preheat an oven to 220C. Line two baking trays with baking paper.

Divide the dough into fourteen (roughly) pieces then roll each one into a ball; they should be about the same size as a golf ball.

Place each cookie onto the lined baking trays leaving room for them to spread. Bake for 12-15 minutes.

Leave to cool slightly before removing from the tray.

I actually quite like that the cookies end up touching at the edges when they spread out on the tray; they break apart very easily once baked. These cookies are, of course, at their very best when fresh from the oven so they are still gooey and the chocolate is all melted. Chocolate and orange are always excellent together and served alongside a hot cup of coffee there’s not much else you could need on a Saturday afternoon.

Filed Under: Baking, Biscuit, Butter, Chocolate, Dairy & Eggs, Eggs, Fruit, March, Orange, Pudding, Recipes By Month, Seasons, Spring Tagged With: Baking, Chocolate, cookies, recipe

Chocolate Rolled Oat Biscuits

January 18, 2017 By All That I'm Eating 14 Comments

Chocolate Rolled Oat Biscuits

Part biscuit and part flapjack, these Chocolate Rolled Oat Biscuits are a doddle to make. All mixed in one bowl and baked in one dish; minimum fuss and washing up, maximum baking satisfaction. I like that these biscuits aren’t too sweet and the generous amount of oats used means they are really filling. I’m not sure if they are technically a flapjack or a biscuit though; the lack of honey or golden syrup isn’t very flapjack-y but then the oaty flavour is so familiar it’s hard to believe it’s not a flapjack! I am sticking with calling them a biscuit on account of the crunch.

Ingredients

You will need (for 14-16 biscuits):

  • 300g rolled oats
  • 200g margarine (you could use butter if you prefer, I happened to have margarine in the fridge)
  • 150g caster sugar
  • 2 tbsp cocoa powder, sieved

Method

Beat the sugar and margarine together well so the mixture becomes smooth.

Add the oats and cocoa powder to the margarine and ensure everything is well mixed together.

Preheat an oven to 150C. Grease a baking tin, ideally one that’s 20 x 25cm.

Press the mixture into the greased tin, making the top as even as possible, then bake for 30-40 minutes.

Remove from the oven and mark into portions while still hot.

Leave to cool before removing from the tin.

If you eat them while they are still a little warm they do have a little bit of flapjack gooeyness; wait until they have cooled and they are a fantastically crunchy biscuit. I would add some dark chocolate chips or maybe some crushed hazelnuts or raisins next time to add something a little extra. I think they’d also be delicious dipped into some melted chocolate, it would finish them off perfectly. Just the thing with a hot cup of coffee and a good book.

Filed Under: Baking, Biscuit, Chocolate, January, Oats, Pudding, Recipes By Month, Seasons, Store Cupboard, Winter Tagged With: Baking, Chocolate, recipe

Marshmallow Rice Krispie Yule Log

December 11, 2016 By All That I'm Eating 17 Comments

Marshmallow Rice Krispie Yule Log - finished

I tried making a traditional Yule Log a few years ago. It was somewhat stressful. Apart from the fact that my butter is never warm enough and I always lose patience and mix it up anyway and deal with the consequential sponge that turns up the whole process is fraught with danger. The rolling up, unrolling, spreading of cream, re-rolling and hoping for no cracking then furiously patching it up with ganache, chocolate flying all over the place. It’s all a bit much for me; I’d rather be sipping a G&T and relaxing rather than cleaning ganache off of the kitchen tiles. That’s how my Marshmallow Rice Krispie Yule Log came about. It’s easy to make and you can fashion it into any shape that you like; the more dexterous amongst you may wish to attempt an actual reindeer.

Ingredients

You will need (to serve 6-8 people with a nice thick slice):

For the icing

  • 250g dark chocolate, broken into small pieces
  • 250ml double cream

For the filling

  • 50g butter
  • 300g marshmallows
  • 125g rice krispies (you can get some gluten free ones to use if liked)
  • 40g honeycomb pieces

Method

Start by making the ganache for the icing. Heat the cream until just hot then stir in the chocolate. Keep stirring until the chocolate has completely melted and you have a smooth mixture. Leave to cool and then refrigerate the ganache.

In a large pan melt the butter and marshmallows together over a low heat, stirring all the time. Keep stirring until there are no lumps of marshmallow then remove from the heat and stir through the rice krispies and honeycomb.

Leave to cool a little before turning out the mixture onto some greaseproof paper.

Once on the greaseproof paper oil your hands lightly and form the mix into a log shape. Or other festive shape of your choice.

Remove the ganache from the fridge. You have two choices here; either you can pipe the ganache onto the log or you can spread it on with a palette knife. I opted for the former but my star nozzle wasn’t big enough so I ended up smoothing it all over with a palette knife anyway!

Decorate as you see fit with swirls and patterns and all sorts then refrigerate until you serve it.

I think it definitely needs a dark chocolate ganache rather than milk chocolate; it would be a bit too sweet otherwise. The honeycomb adds a lovely bit of crunch and caramel flavour; as there aren’t many pieces I think it harks back to hiding the pennies in Christmas puddings. Who knows who the lucky recipient will be! The rice krispie mix is so malleable that if you’re not happy with your shape you can poke and prod it around until you’re completely satisfied. If you wanted to adult-ify it a bit then adding a little booze to the ganache or some of those kirsch soaked cherries (well drained) to the marshmallow mix would certainly be worth a try. This marshmallow yule log is my hassle-free festive centrepiece; I challenge you to stop at just one slice.

Filed Under: Butter, Chocolate, Christmas, Cream, Dairy & Eggs, December, Honeycomb, Marshmallow, Occasions, Pudding, Recipes By Month, Seasons, Sweet Treats, Winter Tagged With: Chocolate, recipe, sweet treats

Chocolate Fudge Cheesecake Brownies

September 11, 2016 By All That I'm Eating 23 Comments

Chocolate Fudge Cheesecake Brownies

I like to think I’m fairly well behaved. The majority of what I eat I make myself and is somewhat healthy and well balanced. I find a place for the indulgent dishes (macaroni cheese, dauphinoise and the like) amongst the day to day soups, salads, vegetables and wholegrains. I’m by no means a saint and I think a little indulgence never hurt anyone. When I plan to make something that’s maybe a little bit ‘naughty’ I make sure I go all out. These Chocolate Fudge Cheesecake Brownies are no exception; prepare to enjoy.

Ingredients

You will need (for 9 brownies):

  • 200g full fat soft cheese
  • 1/2 tsp vanilla extract
  • 200g caster sugar
  • 2 eggs
  • 100g butter
  • 50g light muscovado sugar
  • 100g dark chocolate, broken into pieces
  • 1 1/2 tbsp golden syrup
  • 100g self raising flour
  • 2 tbsp cocoa powder
  • 50g fudge, chopped into small pieces

Method

Grease an eight inch shallow, square cake tin. Preheat your oven to 180C.

Gently beat the cream cheese with the vanilla extract and two tbsp of the caster sugar. Mix until smooth.

Put the butter, remaining sugars, dark chocolate and golden syrup into a small saucepan and heat gently until everything is combined and smooth. Remove from the heat and leave to cool.

Beat the eggs in a large bowl then whisk in the cooled chocolate mixture along with the fudge pieces.

Sift the flour and cocoa powder into the chocolate and egg mix then fold everything together.

Pour the brownie mix into the prepared tin then dollop the cream cheese mixture over the top. Use a spoon or skewer to marble the cream cheese through the brownie mix.

Bake in the oven for 30 minutes or until it’s just coming away from the edge of the tin but is still slightly gooey.

These chocolate fudge cheesecake brownies make you pull the face that only a full fat, full sugar, no compromise baked good can; somewhere between falling asleep, pure satisfaction and absolute delight. The fudge pieces are slightly caramelised and chewy when the brownies are warm, the cheesecake part adds a slight tang and freshness and it’s all surrounded by gooey, spongey chocolate. You need to use a few different bowls for making these so there’s a little more washing up than some of my usual recipes but trust me, it’s worth it. Just think how many extra calories you’ll burn doing the washing up, just in time for when these are ready to come out of the oven.

Filed Under: Autumn, Baking, Butter, Chocolate, Dairy & Eggs, Eggs, Pudding, Recipes By Month, Seasons, September, Sweet Treats Tagged With: Baking, Chocolate, recipe

  • 1
  • 2
  • 3
  • 4
  • Next Page »

Hello I’m Caroline

Welcome to my site All That I’m Eating. You will find inventive recipes using seasonal and foraged ingredients as well as everyday easy meals and a few indulgent recipes too.

I believe humble food doesn’t have to be hum drum so whether you’ve oodles of onions, superfluous sausages or apples aplenty I hope you enjoy having a look around.

Find Out More…

Never Miss A Thing

Subscribe here!

Get all my posts straight to your inbox.

Instagram

Instagram did not return a 200.

Quick Links

  • About Me
  • Contact Me
  • Caroline Taylor Communications

Recent Tweets

  • Error: Invalid or expired token.

© 2018 Caroline Taylor - All That I'm Eating
·
Privacy and Copyright
·
web design::mogul

This website uses cookies to improve your experience. We'll assume you're ok with this, but you can opt-out if you wish.Accept Read More
Privacy & Cookies Policy

Privacy Overview

This website uses cookies to improve your experience while you navigate through the website. Out of these, the cookies that are categorized as necessary are stored on your browser as they are essential for the working of basic functionalities of the website. We also use third-party cookies that help us analyze and understand how you use this website. These cookies will be stored in your browser only with your consent. You also have the option to opt-out of these cookies. But opting out of some of these cookies may affect your browsing experience.
Necessary
Always Enabled
Necessary cookies are absolutely essential for the website to function properly. This category only includes cookies that ensures basic functionalities and security features of the website. These cookies do not store any personal information.
Non-necessary
Any cookies that may not be particularly necessary for the website to function and is used specifically to collect user personal data via analytics, ads, other embedded contents are termed as non-necessary cookies. It is mandatory to procure user consent prior to running these cookies on your website.
SAVE & ACCEPT